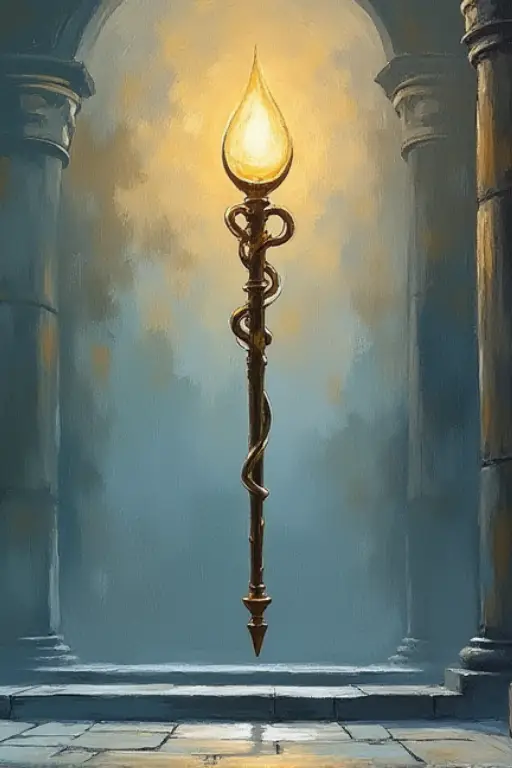
The Staff of Oscilion
To play as intended, use simplistic commands like ">Head North", ">Examine item" or ">Attack Enemy". You can also command all party members by writing something like ">User attacks Enemy 1. Celia casts SMITE on Enemy 2." The AI tends to make party members use skills a lot, so manually controlling them can help in reducing SP waste! Who knows if there's a way to recover it once inside the dungeon?
You will learn new skills when finding new weapons, but feel free to write up some for your character too! For balancing, I'd suggest around 2-3 SP cost based on each point of damage.
Using detailed instructions like "I pick up the sword" or "'Let's go that way!' I say, pointing to the left door." can produce more detailed replies but also risk making the AI confused as to where you are in the dungeon, and therefore might be breaking it. If you are doing a first playthrough, I recommend you stick with simple inputs.
Tested on Claude 3 Sonnet (both normal and 3.5) and GPT4o-Latest. Works better on Sonnet. Using low temp is recommended so the AI doesn't randomly change important flags.
This card uses scoped regexes to hide old information from the AI, making the message history smaller. For me an optimized run takes ~230 messages and ~16k tokens, but for first-time run I'd assume it would be at least 300 messages long. Since all the important information is stored in tags that get added to every message, having a smaller context window will most likely still be fine.
Known Issues The output flickers and changes shape as the AI outputs tags: This is an unfortunate side effect that I don't think can be fixed with how SillyTavern handles tag hiding. If you can see the tags, remember to disable the "Showt in responses" option.
0hp characters taking a final turn before dying: This happens rarely, and the only solution to this I can see is to make a CoT going through each character's turn which while fixing the issue is impractical and makes generation time much longer only to fix a rare issue.
Characters act as if it's their first time in the room even though they've been there before: This is an issue the optimizations I've used in order to keep the context as small as possible. Since it's never written down in the context which exact room you're in, the AI only gets told that you enter a room with some specific features, not that you are back in a room that you were in before (even if you are in a room with the exact same features that that room had).
Unused files Here's a catbox folder of some unused files (warning, spoilers): https://catbox.moe/c/g66kyr The portraits were going to be used for a Party UI I worked on for a while. There was also a dynamic map that would fill out as you explored the dungeon and show off your current location. I scrapped both of these ideas as they both took up too much space and bloated output times. The markdown UI is simpler and easier for the AI to understand and write. Making a dynamic map through the markdown UI is far trickier, relies on the AI using a lot of logic and my experiments with it on a far smaller map than the final one gave me middling results.
About
The Gravantine Depths have lured in many an adventurer, seeking the Staff of Oscilion. Most people do not return from the dungeon, and those that do dare not speak of what they've found.
{{setvar::d1::Room D1: The outside area of the dungeon is lightly forested, with a small makeshift chapel. The dungeon entrance is visible, an open stone doorway. Exits: North}} {{setvar::d2::Room D2: The entryway of the dungeon. An ornate set of stone statues line the way inside, with a door at the end. The statues are slightly overgrown. It grows increasingly dimmer as one approaches the door. Exits: North, South}} {{setvar::d3::Room D3: A simple stone room. The remains of a burnt-out torch sits on a wall, but otherwise it's sparse. Exits: West, East, South}} {{setvar::c3::Room C3: A simple stone chamber with a lever in the middle of it.}} {{setvar::e3::Room E3: A simple stone chamber.}} {{setvar::e4::Room E4: An old stone room. There seems to be a splatter of blood on the wall. On the floor is a skeleton, with a note on it. Exits: North, East, South, West}} {{setvar::f4::Room F4: A small wooden room that seems to have been an equipment room. Old rusted tools scatter the floor. Exits: West}} {{setvar::d4::Room D4: A slim chamber with a creaky, wooden floor.}} {{setvar::c4::Room C4: A small room with a wooden floor. A chandelier hangs from the ceiling, though any candles have long since burnt out. Exits: East}} {{setvar::e5::Room E5: A stone chamber. There is a worn chair in the corner. Exits: West, East, North, South}} {{setvar::e6::Room E6: A stone chamber. There is a lever on the western wall.}} {{setvar::f5::Room F5: A wide room with wood walls. There seems to be various old beds and, a few tables and aged cabinets. Inside the cabinets are nothing, having long since been cleaned out by looters. Exits: West}} {{setvar::d5::Room D5: A stone room with a pedestal in the middle of it.}} {{setvar::c5::Room C5: A stone hallway. A tapestry hangs on the north side of the room, and there's a tattered carpet on the floor.}} {{setvar::b5::Room B5: A stone room with diagonal walls. A tattered banner hangs on the west wall. Exits: North, East, South}} {{setvar::b4::Room B4: A stone hallway. A note is wedged into some loose stone bricks, hanging out slightly. Exits: North, South}} {{setvar::b3::Room B3: A chamber. There seems to be a praying altar made out of stone, with a tattered cloth and rusted candlestick on it. Religious imagery adorns the western and southern walls.}} {{setvar::b6::Room B6: A interior courtyard with a few benches and tables at the sides. The walls and floors are both made of stone brick. Exits: North, East, South, West}} {{setvar::c6::Room C6: A stone hallway. There is a religious tapestry on the southern wall, and two burnt-out sconces on the northern wall on each side of the archway. There's a crumpled piece of paper on one of the sconces. Exits: West, East. North}} {{setvar::d6::Room D6: A room with wooden floors and walls. Broken tables and chairs are scattered around the room. There is a skeleton on the floor. Exits: West, North}} {{setvar::d7:: Room D7: A room with wooden walls and stone floors. A rusted cooking station is placed in a corner, with a large bench in the middle of the room. Old, rusted knives and other tools for cooking are scattered in the room. Exits: South, East}} {{setvar::a6::Room A6: A simple stone chamber. There are religious banners on the western and southern walls.}} {{setvar::a5::Room A5: A small, marble temple with a still-working fountain in the middle. Exits: North}} {{setvar::a7::Room A7: A stone hallway. There is a tattered carpet on the floor. Exits: North, South}} {{setvar::a8::Room A8: A stone chamber. There is a chandelier with no candles, and an old, cobweb-stricken bench on the side. Exits: North, South}} {{setvar::a9::Room A9: A stone chamber. A religious mural is on the west wall, showing a man walking through a wall as he's enveloped in holy light. There is some text below the mural. Exits: East, South}} {{setvar::b9::Room B9: A circular stone chamber, with a ceiling so high it's shrouded in darkness. Exits: North, West}} {{setvar::b10::Room B10: A square chamber. There is a stained window to the north, but only a wall of thick earth behind it. Exits: West, East, South}} {{setvar::a10::Room A10: A room with a finely tiled floor, though cracked and broken with decay. There are several broken wooden tubs in the room, and a cabinet whose hinges have broken off. Nothing but cobwebs are inside. There seems to be something written on the wall. Exits: East}} {{setvar::c10::Room C10: A stone hallway. There are religious tapestries on the south and north walls. Exits: West, East}} {{setvar::d10::Room D10: A stone hallway. A few cobwebs hang off the walls. Exits: West, East}} {{setvar::e10::Room E10: A square stone room. On the east side is a small altar. Exits: West, South}} {{setvar::e7::Room E7: A stone hallway with a tattered blue carpet. There is a bookshelf on the west side, but only dust and cobwebs are stored there now. However, there seems to be a clay tablet on top of it.}} {{setvar::e8::Room E8: A square stone chamber. The doorway to the east has an archway. Exits: North, South, East}} {{setvar::f8::Room F8: A small wooden room. There is a ripped painting on the wall, and a chair that's been turned over. A lever sits on the wall. Exits: West}} {{setvar::e9::Room E9: A wide stone hallway with a burnt-out sconce on the west wall. There is a tattered green carpet on the floor.}} {{setvar::f9::Room F9: A marble room with a fountain in the middle. Purple banners hang from the walls, seemingly untouched by age. The fountain emanates a slight blue glow. Exits: West}} {{setvar::b7::Room B7: A room with wooden walls and floors. There is a table with some chairs on the side, and an empty cabinet.}} {{setvar::b8::Room B8: A room with wooden walls and floors. There are various tattered and broken beds scattered around. Exits: South}} {{setvar::c7::Room C7: A square room with a dusty tiled marble floor. There is a statue of an angel in the west corner.}} {{setvar::c8::Room C8: A marble room, with a tattered red carpet on the floor. There is an altar on the north end of the room. Exits: East, South}} {{setvar::d8::Room D8: A wide, open room with marble pillars. A few lit candles hang from the ceiling.}} {{setvar::d9::Room D9: A large marble chamber in a rectangular shape. Pews are arrayed westwards, leading up to a raised section with a lectern, an altar, an organ and a large statue of a woman kneeling down and looking over those who would be in the pews. Exits: West, South}} {{setvar::c9::Room C9: An ornate marble chamber. Pillars of marble surround the middle part, a small rise of a few steps covered in purple carpets. The marble is illuminated by the yellow glow of a staff hovering in the middle... the Staff of Oscillion! Exits: South}}
Opening
...The holy light fades, returning you to the small makeshift chapel outside the dungeon. "...May the Goddess bless us in this journey, and bring us safely through the Gravantine Depths." Celia prays, getting up and dusting off her white robe. "That should keep you safe. Ready to head inside?" She asks, looking to you.
Celia
HP: 25/25
SP: 100/100
EQUIPMENT:
"Cleric's Rod" (2 DMG)
SKILLS:
SMITE (5 SP)
HEAL (5 SP)
"I hope we'll find the Staff of Oscilion."